

The first time I tried making pasta from scratch, flour dusted my countertop like fresh snow, and I wondered why I had ever settled for packaged noodles.
There's something deeply satisfying about turning a few humble ingredients into silky strands that cook in minutes and taste like a small celebration at the table.
If you've been curious about making your own pasta, this guide breaks it down clearly: what you need, how to do it, and what to watch out for.
<h3>Ingredients and Tools</h3>
<b>1. Core ingredients</b>
You only need a few basics:
- All-purpose flour or “00” flour – 2 cups (about 250–280 grams)
- Fresh eggs: 2 large
- Olive oil: 1 tablespoon
- Salt: 1/2 teaspoon
The dough should feel firm but pliable, not sticky. If it’s crumbly, add water a teaspoon at a time; if it’s sticky, dust lightly with flour.
<b>2. Optional additions</b>
To add flavor or color, you can mix in:
- Spinach puree (well-drained) for green pasta
- Tomato paste for a light red hue
- Finely chopped herbs like basil or parsley
If adding purees, reduce the liquid slightly to maintain a balanced dough texture.
<b>3. Essential tools</b>
- A large mixing bowl or clean countertop
- A fork or dough scraper
- Rolling pin or pasta machine
- Pasta cutter
- Clean kitchen towel
A pasta machine makes rolling easier, but a rolling pin works perfectly well with patience.
<h3>Step-by-Step Process</h3>
<b>1. Form the dough</b>
Pour the flour onto your work surface and create a well in the center.
Break the eggs into the well. Add salt and olive oil.
Use a fork to gently whisk the eggs, gradually pulling flour from the edges inward.
Once the mixture thickens, use your hands to bring it together into a rough dough ball. If it's too dry, add a teaspoon of water. If too sticky, dust lightly with flour.
<b>2. Knead properly</b>
Press the dough forward with the heel of your hand.
Fold it back over itself.
Rotate slightly and repeat.
Knead for about 8–10 minutes until smooth and elastic. The surface should look slightly glossy. This step develops gluten, giving pasta its structure. Skipping or shortening this stage results in noodles that break easily.
<b>3. Rest the dough</b>
Wrap the dough tightly in plastic wrap or cover with a bowl. Let it rest at room temperature for at least 30 minutes. Resting relaxes the gluten, making rolling much easier.
<b>4. Roll and shape</b>
Divide the dough into two or three portions.
Flatten one piece with your hand.
Roll with a rolling pin from the center outward, rotating often.
Aim for a sheet thin enough that you can almost see your hand through it. If using a pasta machine, start on the widest setting and gradually reduce thickness step by step.
For simple noodles, dust the sheet lightly with flour, fold loosely, and slice into strips with a sharp cutter. Unfold gently and lay flat to dry slightly.
<b>5. Cook correctly</b>
Bring a large saucepan of salted water to a rolling boil.
Add pasta and stir immediately to prevent sticking.
Cook fresh pasta for 2–4 minutes only.
Fresh pasta cooks much faster than dried varieties. Taste a strand early to check for doneness.
<h3>Precautions and Practical Tips</h3>
<b>1. Control moisture</b>
Humidity affects dough. On damp days, you may need slightly more flour. In dry conditions, a splash of water can help. Adjust gradually rather than all at once.
<b>2. Avoid over-flouring</b>
Too much flour during rolling can make pasta tough. Use just enough to prevent sticking. Brush off excess before cooking.
<b>3. Mind the thickness</b>
If the sheet is uneven, some parts will cook faster than others. Keep thickness consistent for uniform texture.
<b>4. Don't overcrowd the saucepan</b>
Cook in batches if necessary. Overcrowding lowers water temperature and causes sticking.
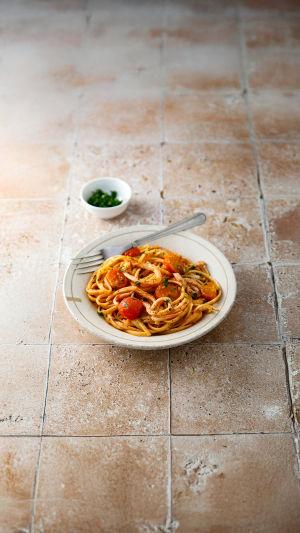
<b>5. Pair with simple sauces</b>
Fresh pasta shines with light sauces—olive oil with garlic, tomato-based sauces, or cream and mushrooms. Heavy sauces can overwhelm its delicate texture.
The beauty of homemade pasta isn't just the taste—it's the rhythm of it. Mixing, kneading, rolling. It slows you down in the best way. The next time flour lands on your countertop, don't brush it away too quickly. Let it remind you that something handmade is about to happen, and that's always worth the extra few minutes in the kitchen.


