

Let’s talk about a sweet little project that makes breakfast, desserts, and snacks instantly better: homemade strawberry jam. This jam is fresh, naturally sweet, and perfect for spreading on toast, mixing with yogurt, or even adding to ice cream.
Unlike store-bought jam, which often uses gelatin or thickeners instead of real fruit, this recipe relies on pure strawberries, sugar, and a little lemon juice—giving us a rich, authentic flavor.
<h3>Ingredients We’ll Need</h3>
Here’s everything to make about 2–3 small jars of jam:
- Fresh strawberries – 300 grams
- Granulated sugar – 180 grams
- Fresh lemon juice – 20 grams (about half a small lemon)
That’s it! Only three simple, natural ingredients for a bright, flavorful jam.
<h3>Step 1: Prepare the Strawberries</h3>
1. Wash 300 grams of fresh strawberries thoroughly.
2. Pat them completely dry with a clean towel. Extra moisture can affect the jam’s thickness.
3. Cut the strawberries into small, even pieces. Smaller pieces cook faster and release more juice.
This preparation sets the base for a smooth, evenly textured jam.
<h3>Step 2: Macerate with Sugar</h3>
1. Place the cut strawberries into a mixing bowl.
2. Add 180 grams of granulated sugar.
3. Gently stir so the sugar coats each strawberry piece.
4. Cover the bowl with plastic wrap and refrigerate for at least 3 hours. Overnight works even better.
Maceration helps the strawberries release their natural juices, which creates a softer, more flavorful jam. If pressed for time, we can skip refrigeration and go straight to cooking—the jam will still work but may be slightly less rich.
<h3>Step 3: Prepare Lemon Juice</h3>
While the strawberries are resting, squeeze fresh lemon juice. We need 20 grams—about half a small lemon. Lemon juice adds a tangy note and helps balance the sweetness, while also supporting the jam’s natural thickening process.
<h3>Step 4: Cook the Strawberry Jam</h3>
1. Transfer the strawberries and any juice released during maceration into a wide, non-stick pan.
2. Turn the heat to medium-high and start stirring constantly.
3. As the strawberries soften, they will release more liquid and begin to bubble.
4. Keep cooking while stirring, allowing water to evaporate gradually. This step takes about 15–20 minutes depending on heat and pan size.
Tip: Use a wide pan to speed evaporation and maintain the jam’s bright color. Avoid narrow or iron pots, which may darken the jam.
<h3>Step 5: Add Lemon Juice and Finish</h3>
1. Once the jam thickens to a glossy, slightly chunky consistency, turn off the heat.
2. Add 20 grams of fresh lemon juice and stir evenly.
At this stage, our jam is ready! It should be thick, shiny, and perfectly sweet with a natural strawberry flavor.
<h3>Step 6: Store the Jam</h3>
1. Prepare clean jars: boil them in water and let them dry completely.
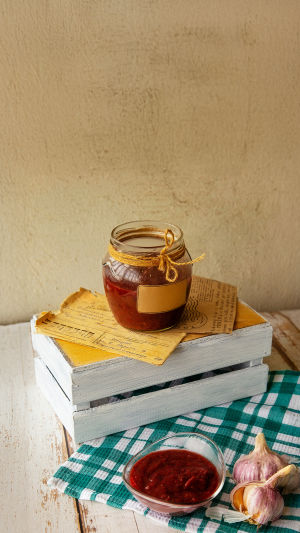
2. Pour the hot jam into jars, seal tightly, and let cool to room temperature.
3. Store in the refrigerator. Properly sealed, the jam can last for several months.
Tip: The higher the sugar content, the longer the shelf life. If we reduce sugar, the jam should be eaten sooner.
<h3>Ways to Enjoy Our Strawberry Jam</h3>
Homemade jam is versatile:
- Spread on toast, pancakes, or waffles.
- Mix into yogurt or oatmeal for a fruity twist.
- Use as a topping for ice cream, cheesecake, or other desserts.
- Fill pastries or cakes for a sweet, natural flavor.
Every spoonful brings out the true taste of fresh strawberries, without any artificial additives.
<h3>Enjoy the Sweet Moment Together</h3>
Making strawberry jam at home is simple, fun, and totally satisfying. From slicing the fresh fruit to stirring the final jar, every step lets us enjoy the process and the natural flavors. Try it this weekend—once we taste that first spoonful, store-bought jam will feel so ordinary. Let’s savor this homemade sweetness together!
How to Make Strawberry Jam!
Video by Preppy Kitchen


