

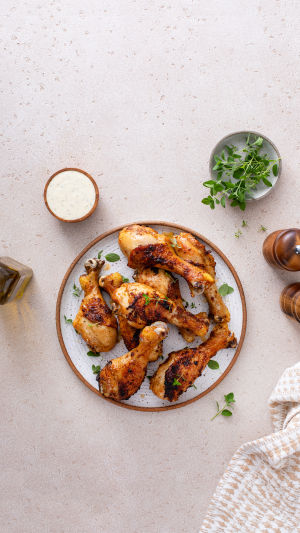
Friends, today we are preparing a simple yet satisfying homemade roasted chicken leg dish that focuses on a perfect balance of texture and flavor.
We aim for a golden, crisp outer skin and soft, juicy meat inside, with every bite full of rich taste.
This recipe is designed to be easy to follow but still precise in each step, so we can clearly control the final result. The key lies in a saltwater soaking method, followed by careful seasoning and a well-managed roasting process that brings everything together beautifully.
<h3>Ingredients We Need (With Exact Amounts)</h3>
For 4 to 6 chicken legs (around 900g to 1kg total), we prepare the following:
<b>Main ingredient:</b>
- Chicken legs: 4 to 6 pieces (about 900g–1kg)
<b>Saltwater soaking:</b>
- Water: 1000ml
- Salt: 10g
<b>Marinade:</b>
- Light soy seasoning: 2 tablespoons (about 30ml)
- Cooking flavor liquid: 1 tablespoon (about 15ml)
- Black pepper: 1 teaspoon
- Garlic powder: 1 teaspoon
- Ground cumin: 1 teaspoon
- Chili powder (optional): 1/2 teaspoon
- Honey: 1 tablespoon (about 15g)
<b>Finishing layer:</b>
- Cooking oil: 1 to 2 tablespoons
These amounts help us create balanced flavor without overpowering the natural taste of the chicken.
<h3>Step One: Saltwater Soaking for Juiciness</h3>
- We start by preparing a large bowl and adding 1000ml of clean water.
- We fully dissolve 10g of salt into the water, making sure there are no grains left. This creates a light salt solution.
- Next, we place the cleaned chicken legs into the saltwater. We make sure every piece is fully submerged.
- We store it in a cool place for 1 to 2 hours. This step helps the meat hold moisture and improves tenderness.
- After soaking, we remove the chicken and gently pat each piece completely dry using clean kitchen paper. This step is very important because dryness helps create crispy skin later.
<h3>Step Two: Building Deep Flavor Through Marination</h3>
- We place the dried chicken legs into a clean bowl.
- First, we add 1 tablespoon of cooking rice vinegar substitute and gently massage it into the meat. This helps reduce any strong raw smell.
- Then we prepare the seasoning mix:
- We combine soy seasoning, black pepper, garlic powder, paprika (if used), chili powder (if used), and honey in a small bowl. We stir until it becomes a smooth paste-like mixture.
- We spread this marinade evenly over each chicken leg. We make sure to lift the skin slightly so some seasoning reaches underneath.
- After coating, we cover the bowl and place it in the refrigerator for at least 4 hours. For best results, we let it rest overnight (around 8 hours). This allows the flavor to fully enter the meat.
<h3>Step Three: Preparing for Roasting</h3>
- Before cooking, we take the marinated chicken out and let it sit for about 30 minutes until it reaches a more natural temperature.
- We prepare a baking tray and lightly brush it with cooking oil to prevent sticking.
- We also preheat the heating space to 200°C. This ensures even cooking from the start.
<h3>Step Four: Controlled Roasting Process</h3>
- We place the chicken legs on the tray with the skin side facing up.
- We roast at 200°C for 15 minutes first. This helps set the shape and begin cooking the inside evenly.
- Then we carefully flip each piece, brush a thin layer of oil, and continue roasting for another 10 minutes.
- Finally, we turn the chicken back so the skin side faces up again. We increase the temperature to 220°C and roast for 5 more minutes. This final step creates a golden crispy surface.
- The total roasting time is about 30 minutes, but the texture result is much richer and more layered.
<h3>Step Five: Resting and Serving Properly</h3>
- After removing the chicken from the heat, we let it rest for 3 to 5 minutes.
- This resting stage allows the juices inside the meat to redistribute evenly. If we cut too early, the juices will escape, and the meat may feel dry.
- After resting, we can serve directly. A light sprinkle of black pepper can enhance aroma.
<h3>Simple Key Tips for Better Results</h3>
- We always dry the chicken well after soaking. Moisture is the main reason skin becomes soft instead of crispy.
- Honey is very important. It helps create a deeper golden color and slightly rich taste.
- We should avoid opening the heating space too often during roasting, because stable temperature is essential.
- The final high-heat step is what creates the crisp skin, so we should not skip it.
<h3>Let’s Wrap It Up Together</h3>
Lykkers, this recipe shows us that great roasted chicken does not need complex methods. With accurate saltwater soaking, careful marination, and controlled roasting, we can easily achieve juicy meat and crispy skin at home.
Once we master this process, we can enjoy a restaurant-style dish anytime we want.


