

Today, we are making a classic sourdough bread with a crisp crust and a soft, airy inside. This bread has a slightly tangy flavor and a chewy texture that makes it perfect for breakfast, light meals, or simple snacks.
Lykkers, after days of preparing the starter, this is the moment we’ve been waiting for. Let’s turn simple ingredients into a beautiful homemade loaf together.
<h3>Ingredients We Need (For One 500g Loaf)</h3>
We prepare the following ingredients carefully:
- Preferment: 100g
- Bread flour: 450g
- Whole wheat flour: 50g
- Warm water: 350g (for mixing) + 25g (for later use)
- Salt: 10g
Make sure the water is slightly warm, around 30°C, not too hot. This helps the dough develop properly.
<h3>Tools We Prepare in Advance</h3>
We need a cast iron container with a lid, a round proofing basket, a dough scraper, and a scoring blade. The cast iron container is especially important because it helps create a high-heat, moisture-rich environment, which gives the bread its signature crust.
<h3>Step 1: Check and Mix the Preferment</h3>
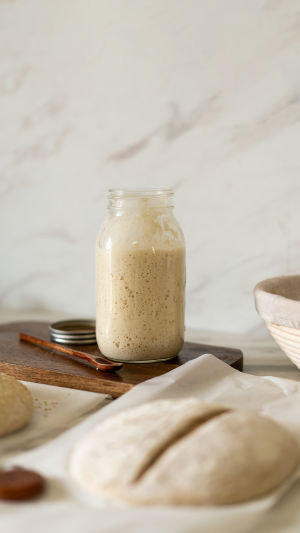
- We start by testing if our preferment is ready. Take a small spoonful and gently place it into a bowl of water. If it floats, it is active.
- Next, we place 100g preferment into a large mixing bowl. Add 350g warm water. Using our fingers, we gently break it apart and mix until the liquid looks cloudy and smooth.
<h3>Step 2: Add Flour and Rest (Autolyse)</h3>
- We add 450g bread flour and 50g whole wheat flour into the mixture. Using our hands, we mix everything until no dry flour remains. The dough will feel sticky and rough at this stage.
- We cover the dough and let it rest for 30 minutes. This step allows gluten to form naturally and improves texture without extra effort.
<h3>Step 3: Add Salt and Final Mixing</h3>
- After resting, we sprinkle 10g salt evenly over the dough. Then we add the remaining 25g warm water.
- We gently press, fold, and squeeze the dough until the salt is fully absorbed. This process takes about 3–5 minutes. The dough will become smoother and slightly elastic.
<h3>Step 4: First Rise with Folding (3 Hours Total)</h3>
- We transfer the dough into a lightly oiled container. Let it rest for 3 hours at room temperature.
- During the first 2 hours, we perform folding every 30 minutes (total 4 times):
- Wet our hands slightly
- Lift one side of the dough from the bottom
- Stretch it upward and fold it over the center
- Turn the container and repeat on all sides
- After 4 folds, the dough becomes smooth, elastic, and holds its shape better. Then we let it rest undisturbed for the final 1 hour.
<h3>Step 5: Pre-Shaping the Dough</h3>
1. We gently transfer the dough onto a clean surface. Lightly dust a small amount of flour on top.
2. Using a dough scraper, we gather the edges toward the center while rotating the dough. This creates a round shape.
3. We let it rest for 30 minutes. During this time, the dough relaxes and becomes easier to shape.
<h3>Step 6: Final Shaping</h3>
We lightly flour the surface again. Then we shape the dough step by step:
- Fold the right side to the center (about one-third)
- Fold the left side over it
- Fold the top down
- Fold the bottom up
Then we flip the dough over so the smooth side faces up. Using both hands, we gently pull it toward us to tighten the surface.
Place the dough into a floured proofing basket, seam side facing up.
<h3>Step 7: Second Rise (3–4 Hours)</h3>
We cover the basket with a cloth and let the dough rise at room temperature for 3–4 hours.
The dough should expand to about 70–80% of the basket size. It should feel airy and slightly springy when touched.
Alternatively, we can place it in the fridge overnight for a slower rise and richer flavor.
<h3>Step 8: Preheat the Oven</h3>
We preheat the oven to 230°C (or up to 250°C if possible) for at least 30 minutes. Place the cast iron container inside during preheating.
This step is very important because strong heat helps the bread rise properly and form a crisp crust.
<h3>Step 9: Score and Bake</h3>
Carefully take out the hot container using heat-resistant gloves. Place it on a safe surface.
We gently turn the dough out from the basket into the container. Then we quickly make a cut on the surface using a scoring blade. This allows controlled expansion during baking.
Cover with the lid and bake:
- First stage: 20–22 minutes with lid on
- Second stage: Remove lid and bake 25–27 minutes
The bread should turn golden brown with a firm crust.
<h3>Step 10: Cool Before Slicing</h3>
After baking, we place the bread on a rack to cool for at least 1 hour.
Do not cut too early, as the inside is still setting. As it cools, we may hear a light crackling sound from the crust—this is a sign of a well-baked loaf.
<h3>Helpful Tips for Better Results</h3>
We always remember that patience is key. If the dough is not ready, we simply give it more time. A strong preferment, proper folding, and full fermentation are the keys to success.
Also, keeping the oven fully preheated ensures the best texture and appearance.
<h3>We Did It Together</h3>
From simple flour and water to a beautiful homemade sourdough loaf, we’ve completed every step together. The process takes time, but the reward is worth it.
Lykkers, are we ready to try baking this ourselves? Let’s enjoy the process, learn from each attempt, and fill our kitchen with the smell of fresh bread.


