

A hallway is often the first thing people see when they walk into a home, and for some reason, it's also one of the most neglected spaces when it comes to decorating.
Blank walls, a coat hook, maybe a mirror if you're lucky — and that's it. A gallery wall changes that completely.
It's personal, it's layered, and a well-done one can make a narrow corridor feel like the most characterful part of the house. The catch? Most people don't know where to start.
<h3>Start by Collecting Pieces You Actually Love</h3>
A gallery wall isn't really a shopping project — it's a collecting project. The best ones are built slowly, from a mix of things that genuinely mean something: a photo from a trip you loved, a print you grabbed at a market, a small painting, a piece of typography that made you laugh.
The point isn't to buy a matching set and call it done (though you can, if that's your style). It's to put together a group of things that tell something about you. Start pulling together what you already have — frames on shelves, prints in folders, postcards pinned to a board — and see what you're working with before you spend anything.
<h3>Plan the Layout on the Floor First</h3>
Jumping straight to hammering nails is how you end up with a wall full of holes and nothing looking quite right. Lay everything out on the floor first, in roughly the shape of the wall space you're working with. Shuffle things around until the arrangement feels balanced — not necessarily symmetrical, but visually settled. Once you have a layout you like, trace each frame on paper, cut out the shapes, and tape them to the wall with low-tack tape as templates.
This lets you see exactly how it'll look before committing to a single nail. Keep the center of the arrangement at roughly 57 to 60 inches from the floor, which is a comfortable eye level for most people. Spacing between frames of around 5 to 10 centimeters tends to feel cohesive without looking cramped.
<h3>Pick a Thread That Ties It Together</h3>
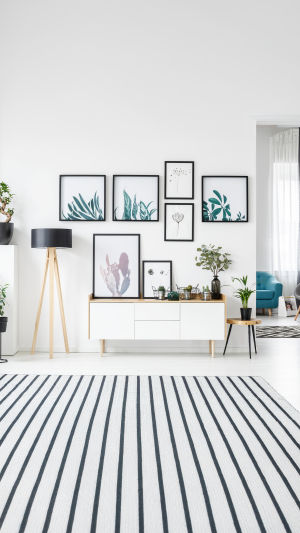
When pieces are very different — different styles, different subjects, different periods — the gallery wall can start to look random rather than curated. The easiest way to pull a diverse collection together is to find one common thread and stick to it. That thread could be the frame color: all black, all white, or all natural wood creates instant visual cohesion even when the art inside is all over the place.
It could be a color palette that runs through most of the pieces. Or it could be a consistent vibe — all botanicals, all black-and-white photography, all abstract. Even one linking element is enough to make the whole arrangement read as intentional.
<h3>Hallways Are Perfect for Flow and Asymmetry</h3>
Long hallway walls suit gallery arrangements especially well because you're not looking at the whole thing at once — you're moving through it. This means you can be slightly less rigid about symmetry and let things flow a bit organically. Arranging pieces around architectural features like doorways or wrapping the display around a corner actually looks great in hallways, in a way that would feel weird in a more static space.
Dark-painted hallway walls are particularly striking as a gallery backdrop — the art pops out against deep color in a way it simply doesn't on white. Gold frames against navy, or bright prints against deep green, both look like they belong in a proper interior rather than an afterthought.
<h3>Not Ready to Commit? Use Shelves Instead</h3>
If the idea of measuring and nailing still feels daunting, picture ledge shelves are a low-commitment alternative that genuinely looks great. Layer prints and small paintings on them — some leaning, some overlapping — and swap things out whenever you feel like a change.
It's flexible, it's damage-free if you ever move, and it gives you the layered look of a gallery wall with none of the permanence. Strong adhesive strips are also worth considering for lightweight frames if your walls are rented or you'd rather not drill.


