

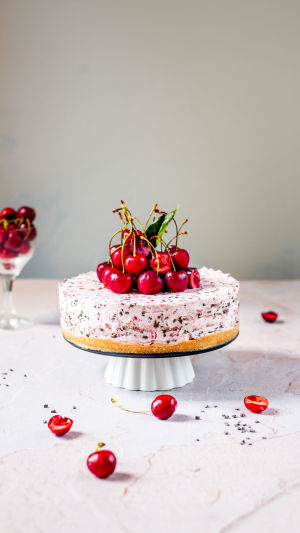
Cherry cheesecake is one of those desserts that feels instantly special, yet the process becomes much easier when you break it into clear steps.
This version brings together a crisp graham cookie crust, a smooth cream cheese filling, and a glossy cherry topping that adds a bright finish. The contrast in texture is what makes it so satisfying: a firm, buttery base, a rich center, and a soft fruit layer on top.
If you want a dessert that looks impressive on the table but follows a reliable method, this recipe is a good one to keep.
<h3>Ingredients</h3>
The recipe has three layers: a crumb crust, a cream cheese filling, and a fruit topping. The first three items make the crust, the next six make the filling, and the can of cherry topping finishes it. You will also need a 9-inch springform pan for a neat shape and easy release. You will need:
- 1 3/4 cups graham cookie crumbs
- 5 tablespoons unsalted butter, melted
- 1/4 cup granulated sugar
- Four 8-ounce blocks full-fat cream cheese, softened
- 1 cup granulated sugar
- 1 cup full-fat sour cream, at room temperature
- 1 teaspoon pure vanilla extract
- 2 teaspoons fresh lemon juice
- 3 large eggs, at room temperature
- One 21-ounce can cherry topping
This makes about 12 slices.
<h3>Steps</h3>
1. Heat the oven to 350°F. Mix the graham cookie crumbs, melted butter, and 1/4 cup sugar until the texture looks like wet sand. Press the mixture firmly into the bottom and slightly up the sides of the springform pan.
2. Prebake the crust for about 10 minutes, then remove it and let it cool slightly while you prepare the filling. This short bake helps the crust hold together and keeps it crisp under the creamy center.
3. Using a mixer, beat the softened cream cheese and 1 cup sugar together until the mixture is completely smooth and creamy. Add the sour cream, vanilla extract, and lemon juice, then mix until just combined.
4. Add the eggs one at a time, beating on low speed after each addition. Do not overmix at this stage, because too much air can affect the final texture. The goal is a dense, smooth cheesecake with a clean slice.
5. Pour the filling onto the warm crust and smooth the top. Wrap the outside of the springform pan with foil, place it in a larger roasting pan, and fill the outer pan with hot water so it rises around the cheesecake pan. This water bath reduces the chance of the surface cracking.
6. Bake for about 1 hour, until the edges are set and the center still has a slight wobble. Then turn off the oven, open the door slightly, and let the cheesecake cool inside for a while.
7. Take it out, let it cool fully at room temperature, and then chill it in the refrigerator for at least several hours or overnight.
8. Once the cheesecake is fully chilled, spoon the cherry topping over the surface and spread it gently. This layer adds color, sweetness, and a little tang that balances the richness of the filling.
9. Slice between cuts for neat slices.
<h3>Helpful Notes and Tips</h3>
Room-temperature ingredients matter because they blend more smoothly and help prevent lumps. Full-fat cream cheese and sour cream give the best texture, so lower-fat swaps are not ideal here.
Avoid rushing the cooling process, since sudden temperature changes can cause faults in the crust. If the top cracks a little, the cherry layer covers it, so it's not really a problem.
To plan ahead, bake and chill the cheesecake in advance, then add the cherry topping just before serving so the surface stays neat and glossy. Keep leftovers covered in the refrigerator, and give the chilling step its full time, since a well-chilled cheesecake slices most cleanly.